# 示例:使用其它字体渲染标注
HeyCloud 内置了几种开源和免费的中文字体。如果有需要使用其它字体且已获得字体版权,也可以自行部署到 HeyCloud 中进行使用。支持 TTF 和 OTF 格式的字体。
# 1. 准备字体
额外的字体需要放到 HeyCloud 的共享文件目录下的fonts目录,默认是数据节点的/var/heycloud-volumes/heycloud-share/fonts目录,如果该目录不存在,则需要手动创建。
假设我们现在准备了一个名为HuaYuanMingChao.ttf的字体文件,放置到了上述的字体目录下。
# 2. 查看字体的代码名字
在将字体部署到字体目录下以后,还需要重新启动「地图渲染」服务,我们可以在「管理控制台」的「监控」-「服务状态」页面进行重启操作。
重启后,再访问渲染 API 的查询字体接口http://host:port/heycloud/api/render/fonts,应该就能看到新加入的字体。下面是放置字体前后的字体列表的比较:
{"result":["DejaVu Math TeX Gyre Regular","DejaVu Sans Bold","DejaVu Sans Bold Oblique","DejaVu Sans Book","DejaVu Sans Condensed","DejaVu Sans Condensed Bold","DejaVu Sans Condensed Bold Oblique","DejaVu Sans Condensed Oblique","DejaVu Sans ExtraLight","DejaVu Sans Mono Bold","DejaVu Sans Mono Bold Oblique","DejaVu Sans Mono Book","DejaVu Sans Mono Oblique","DejaVu Sans Oblique","DejaVu Serif Bold","DejaVu Serif Bold Italic","DejaVu Serif Book","DejaVu Serif Condensed","DejaVu Serif Condensed Bold","DejaVu Serif Condensed Bold Italic","DejaVu Serif Condensed Italic","DejaVu Serif Italic","FZFangSong-Z02S Regular","FZHei-B01S Regular","FZKai-Z03S Regular","FZShuSong-Z01S Regular","Noto Sans CJK SC Regular","Noto Serif CJK SC Regular"]}
{"result":["DejaVu Math TeX Gyre Regular","DejaVu Sans Bold","DejaVu Sans Bold Oblique","DejaVu Sans Book","DejaVu Sans Condensed","DejaVu Sans Condensed Bold","DejaVu Sans Condensed Bold Oblique","DejaVu Sans Condensed Oblique","DejaVu Sans ExtraLight","DejaVu Sans Mono Bold","DejaVu Sans Mono Bold Oblique","DejaVu Sans Mono Book","DejaVu Sans Mono Oblique","DejaVu Sans Oblique","DejaVu Serif Bold","DejaVu Serif Bold Italic","DejaVu Serif Book","DejaVu Serif Condensed","DejaVu Serif Condensed Bold","DejaVu Serif Condensed Bold Italic","DejaVu Serif Condensed Italic","DejaVu Serif Italic","FZFangSong-Z02S Regular","FZHei-B01S Regular","FZKai-Z03S Regular","FZShuSong-Z01S Regular","HanaMin Regular","Noto Sans CJK SC Regular","Noto Serif CJK SC Regular"]}
可以看到,这个字体的代码名字叫HanaMin Regular。
# 3. 使用该字体进行标注
新建一个名为viz-by-my-font.html的文件,内容如下。注意渲染配置中的labelFont属性,对应的是这个字体的代码名字。
<!DOCTYPE html>
<html>
<meta charset="utf-8">

<head>
  <link rel="stylesheet" href="https://cdn.jsdelivr.net/gh/openlayers/openlayers.github.io@master/en/v6.5.0/css/ol.css" type="text/css">
  <script src="https://cdn.jsdelivr.net/gh/openlayers/openlayers.github.io@master/en/v6.5.0/build/ol.js"></script>
  <script src="https://cdn.jsdelivr.net/npm/vue@2"></script>
</head>

<body>
  <div id="app">
    <div id="map" style="width: 600px; height: 600px"></div>
  </div>

  <script>
  var app = new Vue({
    el: '#app',
    data: {
      map: null,
      renderLayer: null,

      accountId: '3897a3d3-3d32-4b6d-a138-489657278b70',
      vdatasetId: 'a444f5c3-c384-4ea2-8543-22295fbe49cb',
    },

    mounted() {
      this.map = new ol.Map({
        target: 'map',
        view: new ol.View({
          center: ol.proj.fromLonLat([140, 40]),
          zoom: 5,
        }),
      });

      fetch('http://localhost:9000/heycloud/api/render/layer', {
          method: 'POST',
          mode: 'cors',
          headers: {
            'content-type': 'application/json',
            'x-heycloud-account-id': this.accountId,
          },
          body: JSON.stringify({
            'datasource': {
              'type': 'vdataset',
              'source': this.vdatasetId,
              'attrFields': ['nl_name'],
            },
            'style': {
              'type': 'polygon-simple',
              'outlineColor': '#000',
              'outlineWidth': 0.6,
              'labelFont': 'HanaMin Regular',
              'labelField': 'nl_name',
              'labelPlacement': 'interior',
              'labelSize': 14,
              'labelHaloRadius': 1,
            },
          }),
        })
        .then(resp => resp.json())
        .then(resp => {
          const { uid } = resp.result;

          this.renderLayer = new ol.layer.Tile({
            source: new ol.source.XYZ({
              url: `http://localhost:9000/heycloud/api/render/layer/${uid}/tile/{z}/{x}/{y}/${ol.has.DEVICE_PIXEL_RATIO||1}/image.png?x-heycloud-account-id=${this.accountId}`,
              crossOrigin: '*',
            }),
          });

          this.map.addLayer(this.renderLayer);
        });
    }
  });
  </script>
</body>

</html>
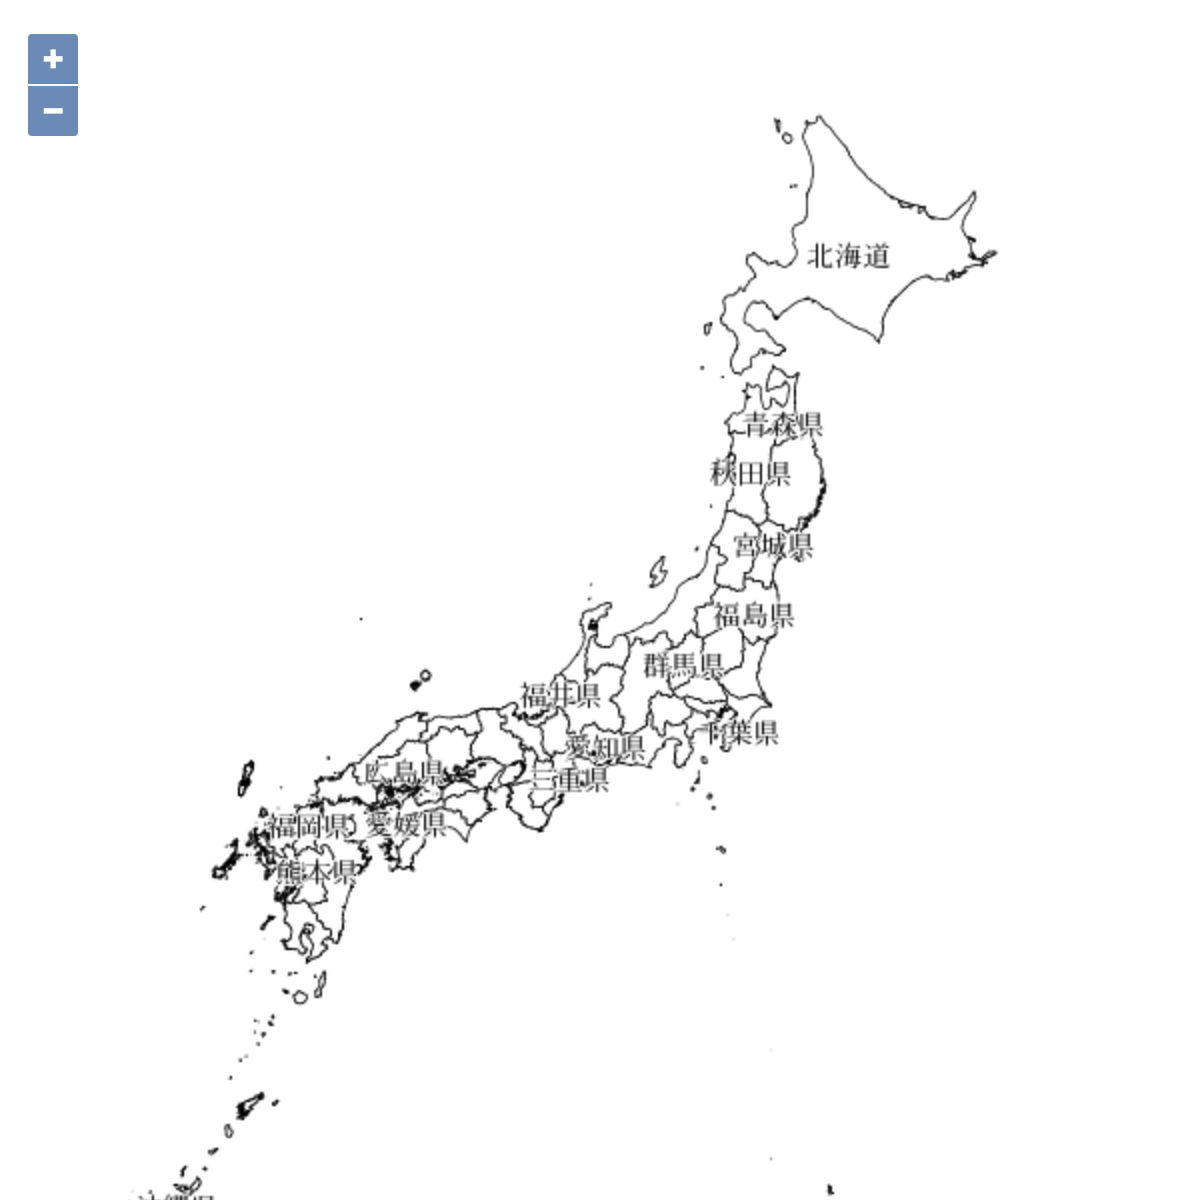
页面将会呈现这样的效果: