# 示例:服务范围计算
通过指定起点,计算从该点出发可以到达的服务范围(到达圈)。
# 1. 搭建页面框架
首先我们创建一个名为 network-service-area.html 的页面,这里我们引入 OpenLayers,在页面上显示一个地图组件,并加载一个开放底图:
<!DOCTYPE html>
<html>
<meta charset="utf-8">

<head>
  <link rel="stylesheet" href="https://cdn.jsdelivr.net/gh/openlayers/openlayers.github.io@master/en/v6.5.0/css/ol.css" type="text/css">
  <script src="https://cdn.jsdelivr.net/gh/openlayers/openlayers.github.io@master/en/v6.5.0/build/ol.js"></script>
  <script src="https://cdn.jsdelivr.net/npm/vue@2"></script>
</head>

<body>
  <div id="app">
    <div id="map" style="width: 600px; height: 600px"></div>
  </div>

  <script>
  var app = new Vue({
    el: '#app',
    data: {
      map: null,
      markerLayer: null,
      markerStyle: null,
      resultLayer: null,
    },

    mounted: function() {
      this.markerLayer = new ol.layer.Vector({
        source: new ol.source.Vector(),
      });

      this.markerStyle = new ol.style.Style({
        image: new ol.style.Icon({
          anchor: [0.5, 1.0],
          src: '../../../../assets/guide/icon-pin.png',
        }),
      });

      this.resultLayer = new ol.layer.Vector({
        source: new ol.source.Vector(),
      });

      this.map = new ol.Map({
        target: 'map',
        layers: [
          new ol.layer.Tile({
            source: new ol.source.OSM(),
          }),
          this.resultLayer,
          this.markerLayer,
        ],
        view: new ol.View({
          center: ol.proj.fromLonLat([7.4126, 43.7407]),
          zoom: 14,
        }),
      });
    }
  });
  </script>
</body>

</html>
# 2. 响应鼠标点击事件
然后,我们在鼠标点击的时候,在地图上添加代表位置的图标。每次点击都会清除原有的坐标点和结果:
this.map.on('click', function(evt) {
  const markerSource = this.markerLayer.getSource();
  markerSource.clear();

  const resultSource = this.resultLayer.getSource();
  resultSource.clear();

  const { coordinate } = evt;
  const feature = new ol.Feature({
    geometry: new ol.geom.Point(coordinate),
  });
  feature.setStyle(this.markerStyle);

  markerSource.addFeature(feature);
}.bind(this));
这时,页面会随着鼠标点击,会显示点击的位置。
# 3. 计算从该点出发的到达圈
调用 API 计算这个点的服务范围,将鼠标点击的坐标传入point参数,同时指定通过distance参数来指定服务距离。注意,一般情况下还需要通过sr参数设置地图的坐标系以匹配坐标的格式:
fetch('http://localhost:9000/heycloud/api/routing/network/sample/serviceArea', {
    method: 'POST',
    mode: 'cors',
    headers: {
      'content-type': 'application/json',
    },
    body: JSON.stringify({
      'point': coordinate,
      'sr': 'web-mercator',
      'distance': 1000,
      'concavity': 1,
    }),
  })
  .then(resp => resp.json())
  .then(resp => {
    const { hull } = resp.result;
  });
在 API 调用结果中,我们能够得到计算后的到达圈hull。然后,我们可以将结果显示到地图上:
const hullStyle = new ol.style.Style({
  stroke: new ol.style.Stroke({
    color: '#fff',
    lineDash: [4, 4],
    width: 2,
  }),
  fill: new ol.style.Fill({
    color: '#f00',
  }),
});

const feature = new ol.format.GeoJSON().readFeature(hull);
feature.setStyle(hullStyle);
resultSource.addFeature(feature);
这样地图会显示如下的效果:
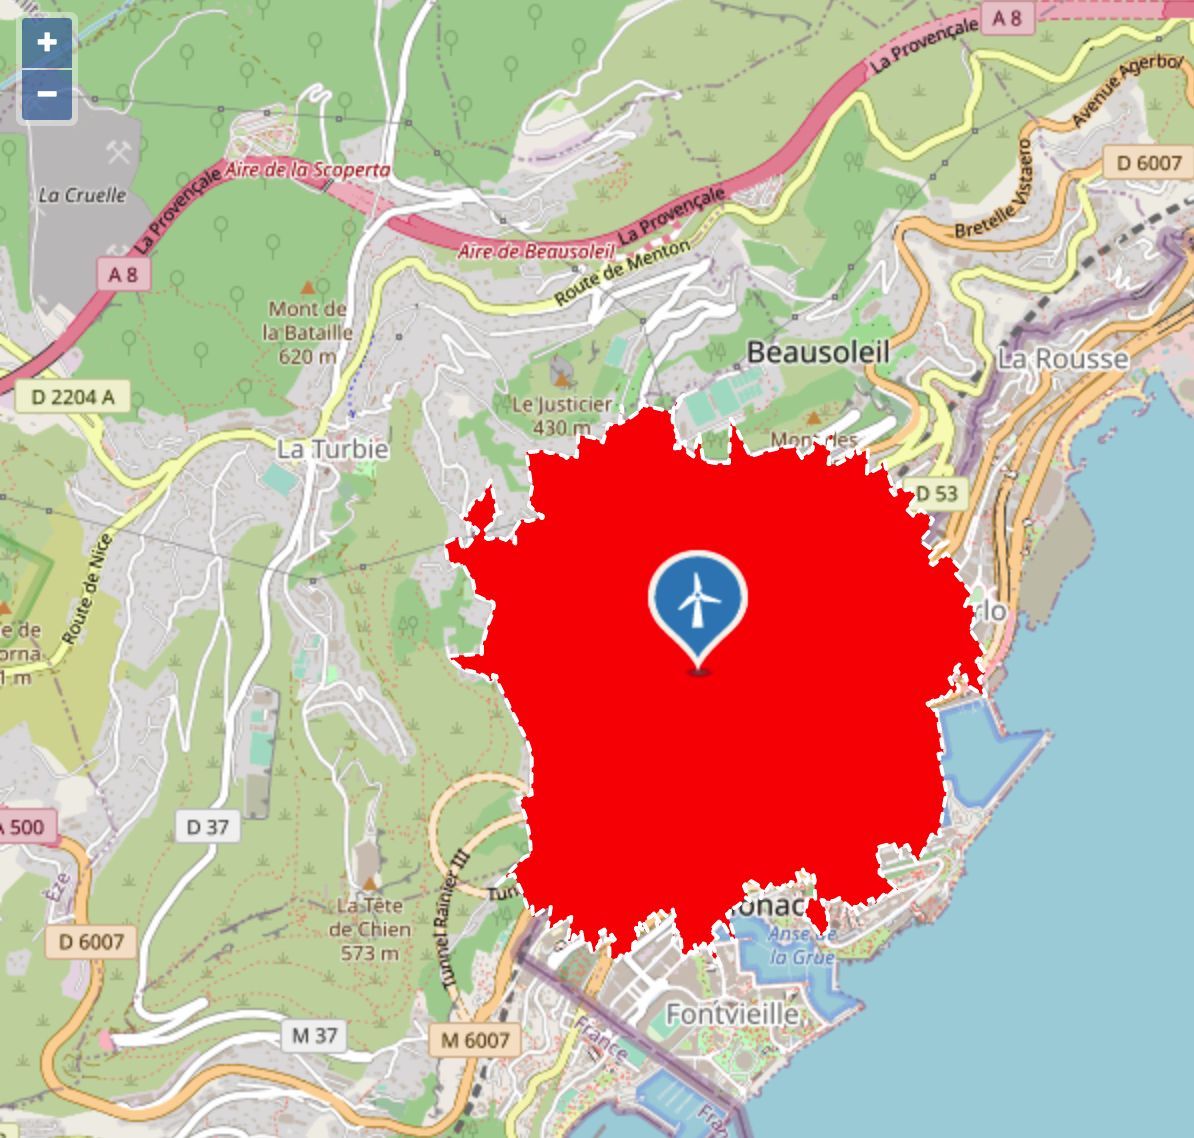
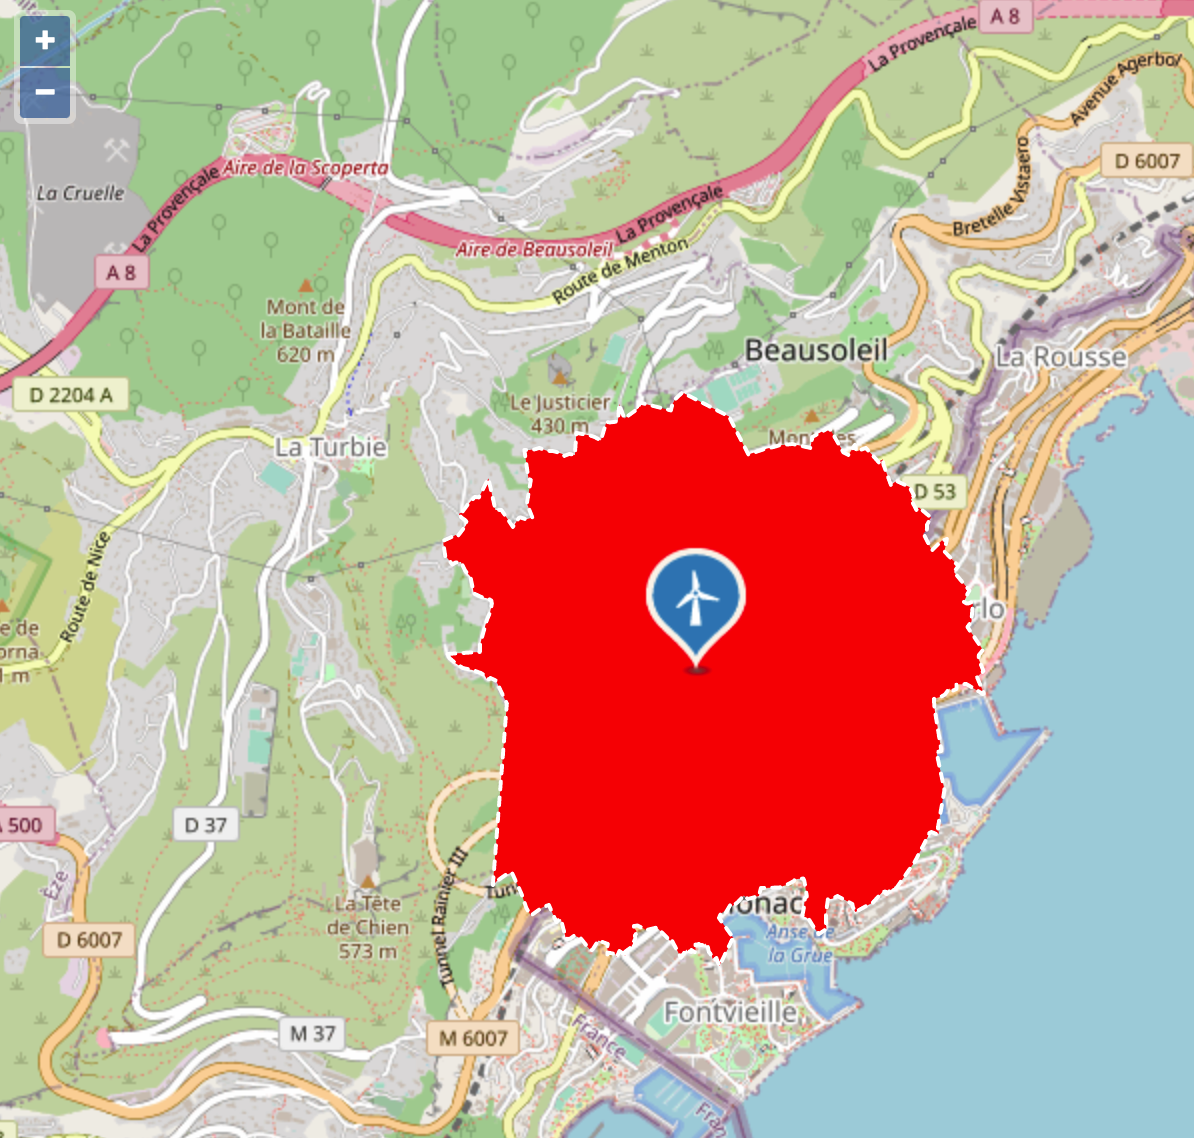
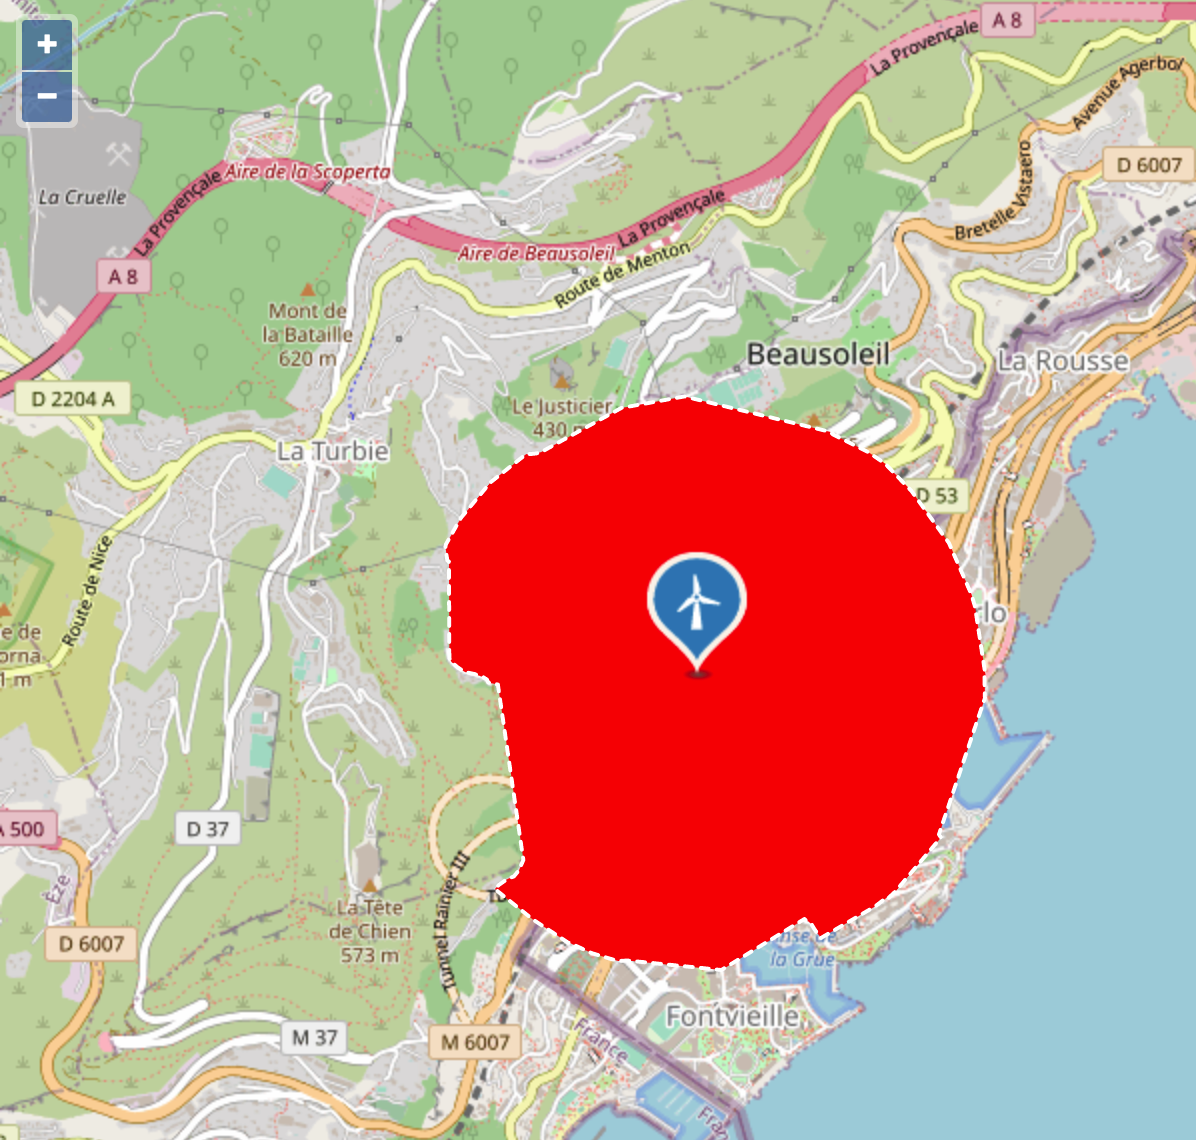
# 4. 设置到达圈的凹凸度
在请求计算的时候,还有一个concavity参数可以用于设置最后生成结果的凹凸程度,这个参数可以影响从离散的道路节点生成到达范围这个过程中,生成形状的凸出程度。这个参数的默认值为 1 ,下面我们看一下分别设置为 2、10 时候的效果:
← 示例:最快路线计算 示例:在客户端渲染底图 →